Please note that this feature is only available in Finland and in the Baltics
Our influencers campaigns feature is for marketers who lack the time, struggle with finding influencers, or want the content to use on their brand’s social media channels.
Let’s have a closer look at how to the campaign running feature works – click on the headline to find what you’re interested in! 👇🏼
Creating a campaign
When creating a campaign, you can choose between two campaign types:
▸ Influencer campaign – this is the traditional influencer marketing campaign type. Influencers will do posts, stories, or reels, introducing your brand or product to their audience. This way, you can grow your brand images, reach new audiences, and increase sales.
▸ Content-only campaign – this is the campaign type where influencers create photos or videos for your brand but do not share it on their channels. This way, you’ll get unique, authentic, and trendy content for your brand’s social media.

Influencer campaigns
1. Set up your influencer campaign
2. Interested influencers apply to the campaign
3. Selects influencers you’d like to collaborate with
4. Influencers upload their content to Promoty
5. You review the content (confirm it or ask for changes)
6. Once the content is approved, influencers can post it to social media
7. You can see the campaign statistics on Promoty
STEP 1: Set general campaign info
In the Campaign Builder, you can add:
• Name your campaign – this is one of the first things that the creator notices so make sure to make it catchy;
• Set the dates for the campaign:
1. Start date is the date your campaign will be shown to influencers on their app
2. Applications close date: the date after which new people can no longer see your campaign on their feed nor apply to your campaign.
3. End date – by this date, all collaboration posts have to be posted and your campaign will be ended.

• Describe your campaign – an overview of the brand, the goal of your campaign, and why influencers should work with you;
• Set hashtags for your campaign – these are the hashtags that the influencer will have to mention in their post. The less the better! Hashtag #ad will be added automatically as the labeling of advertising on social media is mandatory.
STEP 2. Requested contents
• Add content: are you expecting Stories, feed posts or both from the influencer? Also add how many of each you want them to post and by when the content should be posted.
P.S. Make sure the dates you set here are before the end date of your campaign!

STEP 3: Payment methods
The Payment Menthods tab lets you choose whether you are going to reward the content creators with money, products or both.
• Enable rewarding with money: you won’t be able to set the price since all influencers charge differently. They’ll set their price for the collaboration when applying to your campaign.
The price you’ll see on each application consists of the influencer’s fee and our platform fee which means that the number you see there will be the end price for that collaboration.
• Enable rewarding with products: you can add the product’s name, a link to the product, description and value. If you add more than one product, the applicants can choose which one(s) they’d like to receive. Please note that the influencer won’t see the value of the product – if you want them to know it, you can include it in the product name (for example: “100$ gift card”).
When rewarding influencers with products only, Promoty charges a fixed fee of 10€ + VAT for each posted content.

STEP 4: Targeting
Under Targeting, you can set what kind of influencers you want to find: how many followers they should have, where their audience should be based, the influencer’s gender, age, etc.
Only influencers who match with your filters are going to see your campaign. We recommend not setting the criteria too narrow – this way, you might accidentally exclude influencers who could be your biggest fans!
Filters that could need some explaining:
Audience location: where the majority of the influencer’s audience should be based at
Influencer’s spoken language: choose the language that your campaign brief is written in and any additional languages you need them to speak
Influencer location: where should the influencers you want to target be located at? If your campaign involves products, you should be ready to send them out to locations chosen here. If your campaign is in a local language, for example, Finnish, you should choose Finland or a specific town as the Influencer’s location.

After submitting the campaign
Once you have submitted your campaign, our team will go over it and get in touch with you if you need to do any changes. If all looks good, we’ll send you a confirmation email.
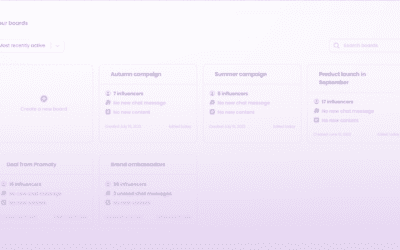
You can see all your campaigns and their statuses under the Campaigns tab
• If the campaign hasn’t started or hasn’t been approved yet, it will appear under Drafts
• Once it has been approved, you will get an email notification and the campaign will be shown under Running Campaigns (PS! it won’t be visible to influencers before the date you set for Start Date under Duration)

2. Starting out with collaborations
2.1. Select the influencers you’d like to work with
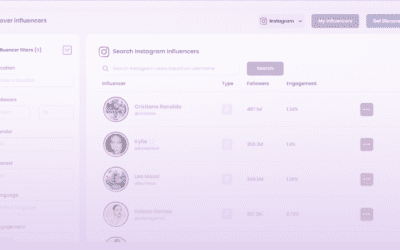
You can see your campaign applicants when you go to Campaigns > under Running Campaigns click on a specific campaign > Applications.
There you can see all the influencers who have applied for your campaign: you can see their creative idea, social media statistics, and the final price of the collaboration.
Once you have decided whether you want to work with them or not, you can accept or reject the applicant.
PS! If you want to negotiate the price asked by an influencer, make sure to do that before accepting the influencer to the campaign! You can use Chat for that.

If it’s a product campaign, the next step is sending out the products. In general, it’d be good to deliver it as fast as possible after approving the influencer! Under Shipping, you can find influencers’ addresses, contact information, and the products they chose.

2.2. Approving submitted content
Under Review tab, you can see the submitted content that’s divided into three:
a) Waiting for review: content that you have to approve or reject by requesting changes
Clicking on “Request changes” means the influencer will see the rejection reason, make changes accordingly and resubmit the content.
b) Approved: content that you have approved and is ready to be posted online
You can see and download the full image by clicking on the photo.
c) Rejected: content that you have rejected
The brand does not have the obligation to purchase any of the submitted content – if the content created does not meet the campaign’s brief or brand’s expectations for quality, the brand may reject the post or ask for changes.
To protect the influencer’s content, all posts have a Promoty watermark on them. When the brand buys a post, they can download the photo in full size without the watermark. Purchased content social media rights belong to the brand which means the brand can use it on all of their social media channels.

The content that’s has been uploaded online appears under Content. There you can also see the statistics for each post: likes, comments, reach, impressions, saves and engagement rate.

2.3. Keeping track of your campaign statistics
On Promoty, you can easily see how your campaign is doing: the number of impressions, reach, likes, comments, saves and engagement rate for each post as well as for the whole campaign.
If you have any questions about the platform, feel free to reach out to info(@)promoty.eu. If you need help with influencer marketing strategy and campaign management, check out our campaign management solution – we’d love to help!
Content-only campaigns
In content-only campaigns, creators create photos and videos for your brand but do not share them on their social media. This way, you’ll get unique, trendy and eye-catching visuals for your brand’s social media channels.
This is how it works:
1. You set up a content-only campaign
2. Interested content creators apply to the campaign by setting their price and writing their idea on what kind of content they’d create
3. You accept the ones you’d like to work with
4. They upload the photos or videos to Promoty
5. You buy the content you like and get the rights to use it on your social media channels
STEP 1: Setting up the campaign
Setting up a content-only campaign is almost the same as setting up a regular influencer campaign. There are only two differences:
a) Make it clear in your brief that your goal is to get visual content for your brand’s social media channels.

General

Guidelines
b) Under Targeting, you won’t be able to filter influencers by their audience because they won’t post the visuals on their channels, hence it doesn’t matter.
So, set filters considering who could take great content for your brand – we don’t recommend setting the filters too narrow.

STEP 2: Choosing influencers
When choosing collaboration partners from applicants, keep in mind that the price you see there is their price per one photo/video.
How to choose? Have a look at their social media feed – does their style match with your brand’s?

STEP 3: Purchase the content
You can find the submitted content under Review.

The price you see there is the final price for that piece of content. You’ll be able to download the photo/video in full resolution and without the watermark after purchasing. And then you can use them on your brand’s social media channels!
Please note that this feature is only available in Finland and in the Baltics
If you have any questions about the platform, write us via [email protected] – we’d be happy to help!